This is a companion blog post to the video tutorial here: I will give details here that are hard to follow in the video.
In this tutorial, I will show how you can create a .zip file that participants can unzip onto their own computer, run, and then follow your instructions for getting the data back to you. This is the basic approach that other remote use cases will build on. To do this, you should download the PEBL standalone .zip version 2.1.4 file found here. EARLIER VERSIONS WILL NOT WORK. Run the standalone version of PEBL for the rest of the steps. Depending on your OS, windows defender may warn you not to run it, but do it anyway.
Step 1: Determine the test or tests you will use.
The first step is to identify the tests you will use. You may want to customize the test, especially the instructions, to make things especially clear. You can do this by using the ‘translate test’ button. If you have a single test, the setup is pretty simple. If you have multiple tests, you will probably want to use the custom launcher, which is available to PEBL Donors. You may also create a simple IRB informed consent or instructions script. A sample script is available in the standalone download but the basic script looks like this. If you have an image you want to show, the download script includes the ImageBox() function that you can use.
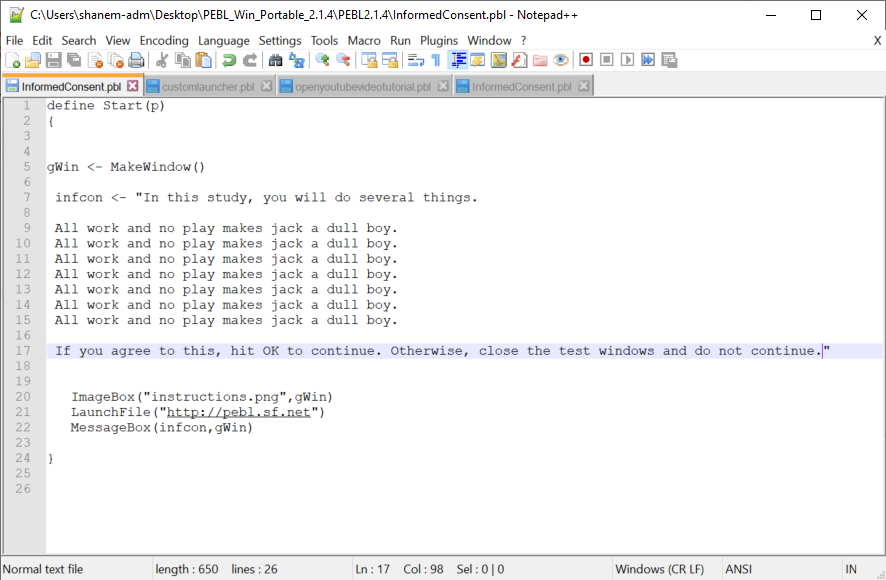
You can make new versions of this for intermediate instructions, or debriefing. In addition, you can use the LaunchFile() function to send the user to a specific website.
At this time, you should also write/save any specific parameter settings for each test you want to use. These parameter files will need to be transferred to the standalone version, or set using the standalone version.
You should also identify the data files for each test you want to use. In the methods I describe here, participants must find these files and send them back to you if you want the data (and you probably do!).
Step 2: Create a launch chain of the tests you want to use.
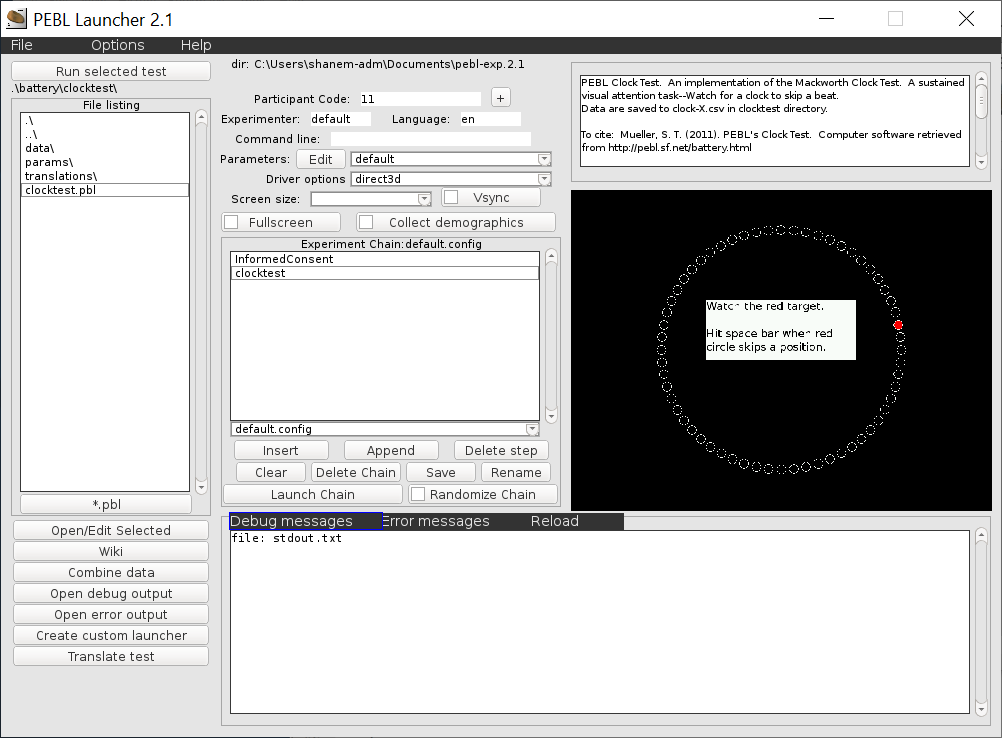
One-by-one, add each test you want to use, in order, to an experiment chain. Select the parameters you want to use and save these settings before adding them to the chain (the parameter file gets saved to the chain). This screenshot shows me adding the clocktest to a chain after the informed consent file has already been added. Hit ‘save’ to save the chain. It is easiest to use default, but you can so rename it if you have multiple chains you eventually want to use. Test the chain to make sure it works.
Step 3. Create and test the custom launcher.
With the chain saved and selected in the pulldown, hit the ‘Create custom launcher’ button on the lower right of the window. This is only available if you have the password, which I give to donors and contributors and people who ask nicely. This will create a .bat file in the standalone directory with the name of the experiment script. Test the custom launcher .bat file to see if it works. The first screen looks like this, and asks the user to enter a participant code. This is a code you might provide to them.
The next screen looks like this. There is just one button for them to use–the START button. This will chain them through each of the tests in the experiment chain you made.

Step 4. (Optional) Customize the custom launcher.
The custom launcher is saved in PEBL\pebl-lib\customlauncher.pbl.
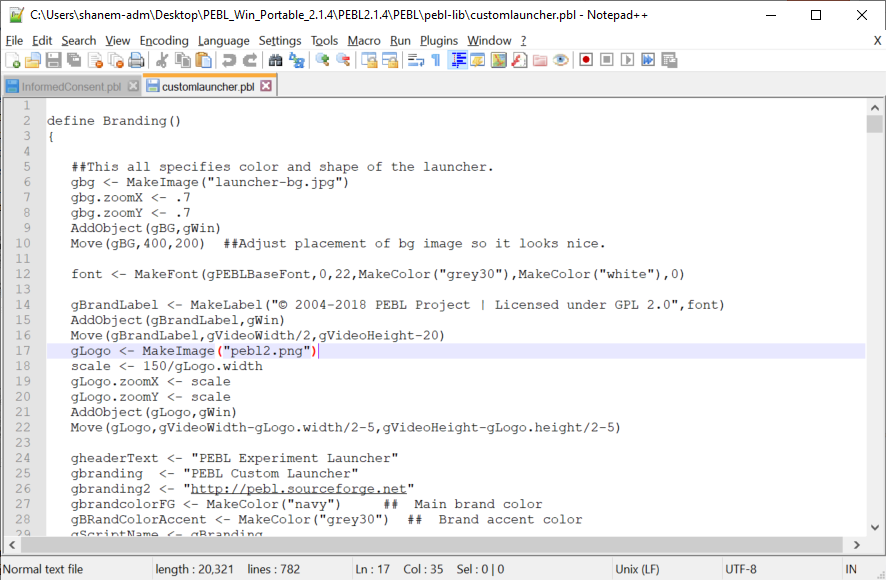
You can edit various text and images to customize it like you want. Most of what you would want to change is in the Branding() function, and you can change text headers, colors, and logos/images by saving a different image file in that directory.
One option to consider is the default state of the ‘run uninterrupted’ checkbox. This can be set on line 65
##should you run uninterrupted
(default value)
uninterruptedstate <- 1
By default, the custom launcher will work through each test without returning to the launcher. If you set this value to 0, it will go back to the launcher between each test, and the user will have to click the big blue button to continue to the next test.
Step 5. Delete unused files (optional).
There are a lot of files you can delete to help save space. The default zipped download is about 50 mb, which is not terrible, but you can delete the demo\ folder, everything you are not using in the battery\, and the tutorials\ folder. If you really need more space, there are a lot of files in PEBL\media\ that you can get rid of, depending on the test you are using. For example, most of the fonts won’t be used (probably only DejaVu fonts, which is the default), and many of the files in sounds\ and images\. The font files probably take up the most room, and you can almost certainly delete fireflysung and wqy-zenhei unless you are using non-western fonts. It is probably easiest to not remove anything, as long as your users have no problem downloading 50 mb. Because you will need to have the participants search through the files to find the data, it is best to get rid of everything in battery you do not use. The data will be saved in the data\ subfolder of each test you run.
Step 6. Create your .zip package and instructions
To simplify things for your users, you should make a new copy of the pebl2.1.4 folder, and delete the ‘runPEBL.bat’ file, so only one .bat file exists. You can rename this anything.bat you want–like RUN THIS FILE TO START THE STUDY.bat.
Create a zip file using your favorite zip software. Some software, like winzip, will let you create a self-extracting .exe file, which is handy. Windows will let you browse a zip file without unzipping it, but if you try to run PEBL from there it won’t work. A self-extracting zip or clear instructions prevents this error.
You will probably host this .zip download on a web site because many email servers block .zip files. You will need to provide detailed instructions for your participants anyway, and perhaps informed consent on-line. Some things to consider:
* Basic instructions. how to download, unzip, and launch the tests. Instructions on how to bypass the windows defender security check.
* Links to other on-line tests/surveys the will need to take.
* what code to enter for the subject code.
* How to find and send you back the data.
* Who to contact for help
I’d suggest you also make a video describing step-by-step instructions as well.
Conclusions
This tutorial covers making a downloadable package for running one or more PEBL tests by participants on their own windows machines. Look to other tutorials to see how to have the data uploaded directly to a server, and other remote data collection solutions.
272 comments on “Using PEBL Remotely Tutorial 1: creating a standalone package for participants to download”
Comments are closed.